A clean chimney is silent high-end. It requests no interest, yet rewards you with clean-burning fires, tidy masonry lines, and air that smells like oak and winter instead of residue. When it fails, nonetheless, the indicators are immediate and frequently costly. Smoke lingers. Plaster fractures. Repaint bubbles. A discolor creeps across the ceiling after a storm. I have walked a lot more roofing systems than I like confess, and the very same concerns appear over and over, whether the house is a prewar brownstone or a modern-day chateau with radiant floorings. The difference between a concern and a weekend break in this domain name is basic: recognize the 5 usual problems, address them with correct products, and do the job prior to the season turns.
Below, I'll take you with the 5 issues that lead most Chimney Repair calls. I will certainly clarify why they occur, how we repair them, what you can do on your own, and when to bring in a professional. Think about it as a maintenance plan with the coating quality of great millwork, only focused on brick, mortar, and the air you breathe.
Why tiny smokeshaft troubles become big ones
Chimneys live at the climate line. They gather rainfall, freeze, cook in late-summer sunlight, and wick moisture via permeable block. Warmth surges up the flue in wintertime and afterwards cools down rapidly as soon as you damp down the fire. Products expand and contract. Mortar ages. Metal rusts. Every joint, crown, and joint is a possible entrance factor for water, which is the opponent of masonry. Left to itself, water opens up hairline fractures and afterwards leverages freeze-thaw cycles right into architectural damage. Inner components get on no much better. A fractured flue liner silently jeopardizes the draft, and that implies smoke, creosote, and sometimes carbon monoxide moving where it shouldn't.
Most failures follow a pattern: moisture discovers a path, problems expand via seasonal cycles, and the chimney begins to stop working in layers. The conserving grace is that many repair services are uncomplicated when handled with the ideal materials and timing. The trick is to review the indicators early.
Problem 1: Stopped working chimney crown - the thin line between your flue and the sky
The crown is the sloped cap of mortar or concrete that seals the top of the chimney, dropping water away from the flue. It is not decorative. When the crown cracks, water moves into the top training courses of block and freezes. Over a few winter seasons, the damage spreads down the pile. I see this most often on crowns made from typical mortar rather than air-entrained concrete or specialized crown materials. Mortar reduces and fractures. Concrete holds.
Telltale indications appear as hairline cracks emitting from the flue tile, loose fragments at the sides, moss along the crown's low points, and damp blocks promptly listed below the top. Indoors, you may observe pale staining on the attic sheathing near the chimney chase or a seasonal musty smell near the fireplace regardless of no evident leaks.
An appropriate fix begins with preparation. We get rid of harmed product back to sound substrate, clean completely, and bond a new crown that prolongs past the outdoors edge of the smokeshaft with a drip kerf to toss water free from the brick. If the flue ceramic tile finishes flush with the top, we leave a thermal break around it so the liner can expand. For costs job, I prefer fiber-reinforced crown blends developed for chimneys, applied in a solitary, continual pour to a minimum thickness of 2 inches at the facility and 1.5 inches at the sides, with an incline that loses water emphatically. If the visual calls for it, a cast-and-formed crown can be completed as smooth as a kitchen counter and sealed with a breathable silane-siloxane water repellent after 28 days of remedy. Where budgets or timelines determine a faster fix, elastomeric crown layers developed for UV direct exposure can bridge hairline cracks and include years, supplied the substratum is stable.
Homeowners often ask about caulking cracks. A grain of silicone throughout a moving joint will certainly get one season at best and normally traps wetness underneath. Use it just as a momentary climate hold up until the genuine job can be done.
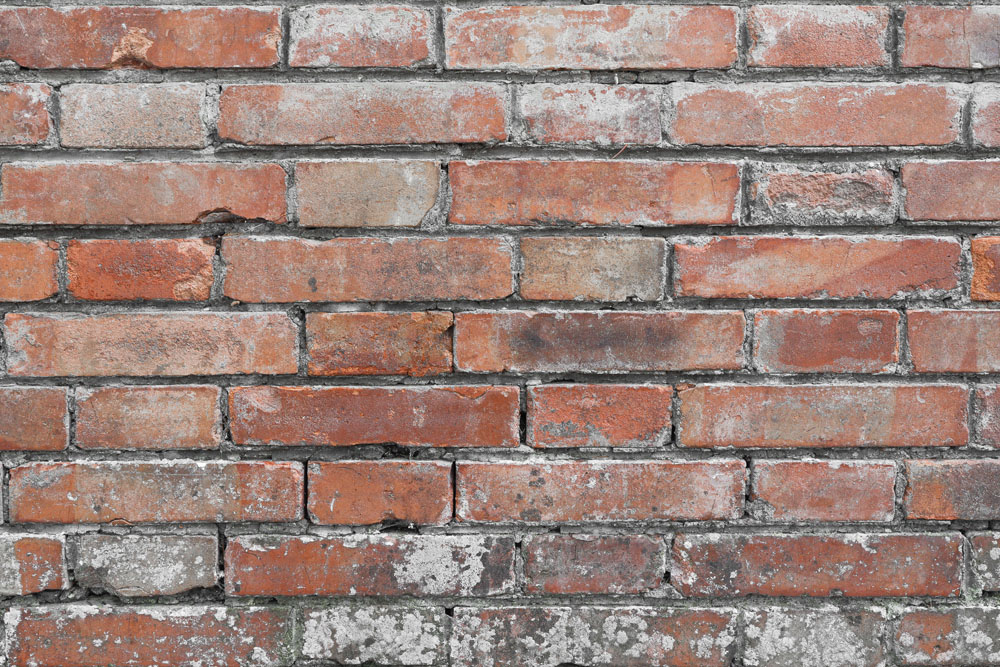
Problem 2: Spalling brick and tatty mortar joints - the slow crumble
Spalling is the term for block faces standing out off in flakes, typically exposing a harsh, pitted core. It tends to appear on the weather side of the chimney, and it is generally a dampness story. Water enters through a broken crown, fell short flashing, or absorptive joints, after that damages the block surface during freeze-thaw cycles. Soft historic block is especially vulnerable. Modern high-fired brick prices much better, yet not forever.
The repair work has two parts: stop the water and bring back the stonework. If the crown leakages, fix it initially. If blinking has stopped working, that follows. Only then repoint and replace. Repointing is a craft, and the mix matters. Use a mortar compatible with your brick. On prewar homes with low-fired, soft block, a lime-rich Type O or N mortar usually makes good sense. It is softer and more flexible, which enables the joint to occupy motion and sacrificial wear as opposed to the brick. Hard Portland-heavy mixes can fracture historical block gradually. On contemporary smokeshafts, Type N is a dependable criterion. The shade and tooling need to match existing job, both for stability and aesthetics.
When spalling has destroyed greater than the outer face, the option is discerning replacement. We removed damaged units and set up matching brick bedded in the right mortar. Occasionally the block is no more made. Because situation, we mix restored devices or make use of carefully selected brand-new brick with a wash to balance the shade and appearance. Once repairs heal, I frequently use a breathable water repellent to the stack. The item needs to be vapor absorptive. Non-breathable sealers catch wetness and can speed up the very failing you're attempting to prevent.
A note on over-cleaning: I have actually seen proprietors sandblast their smokeshafts in search of a crisp red coating, then call us 2 winter seasons later on with widespread spalling. Abrasive cleaning opens up the block's surface area and invites water. If you need to cleanse, make use of a gentle detergent and low-pressure rinse, or leave the patina intact.
Problem 3: Broken or unlined flue - unseen risk with really visible consequences
Inside your smokeshaft, the flue brings smoke, warmth, and burning results up and out. Clay floor tile linings are common, and when installed properly they do for years. They additionally fracture, chip, and countered at joints as the smokeshaft changes a portion of an inch in time. Unlined flues still exist in older homes, and I treat them as immediate. A jeopardized flue leaks warmth and gases right into the masonry and surrounding framing. In the most awful instances, carbon monoxide gas finds a path indoors. Also in much less remarkable circumstances, a harsh or broken liner urges creosote down payments and inadequate draft, which makes fires smoky and harder to start.
The first step is evaluation. A level-one chimney sweeper won't catch whatever. An electronic camera check of the complete flue length offers a straightforward photo: cracks, voids, misaligned floor tiles, and dimensional modifications. For wood-burning fireplaces, you desire a smooth, constant, code-compliant passage sized appropriately to the firebox opening. For gas appliances, airing vent needs are various and commonly stricter.
Repairs fall under three major techniques. Floor tile repair service systems that reline with cementitious coverings can work for hairline splits when floor tiles are or else plumb and solid. Stainless steel liners, appropriately sized and insulated, are the gold criterion for convenience. They produce a smooth, constant course and bring older smokeshafts as much as modern-day security criteria for timber, coal, oil, or gas. Insulation coverings or pour-in insulation guarantee proper draft and keep the liner cozy, which enhances performance on cool starts. In one of the most endangered heaps, we remove the old ceramic tile and established a brand-new lining system from square one. It is not extravagant job, but the outcome is palpable: fires start quickly, smoke lifts, which faint whiff of residue you when observed after a long melt disappears.
Owners often ask if they can remain to use a broken lining "just for one period." I advise against it. Unlike a loosened block that you can see, a lining defect conceals its escalation. Heat finds a void, timber dries out in the surrounding chase, and the next time the fire runs hot, you have the active ingredients for a smokeshaft fire. Place the lining at the top of your Chimney Repair list.
Problem 4: Flashing and counterflashing failures - where the chimney meets the roof
Where stonework satisfies roof, sheet steel takes control of. Blinking directs water far from that joint and is made up of two components: base blinking that tucks under roof shingles and up the block, and counterflashing that is let into the mortar joints and folded up over the base. When mounted well in copper or stainless, blinking lasts decades. When cut edges are taken, it stops working rapidly. Usual sins consist of face-sealed blinking with surface caulk just, superficial chase cuts that barely hold, wore away galvanized steel in coastal air, and missing out on saddle crickets on the uphill side of vast chimneys.
You will often see the proof on the ceiling long before you see it on the roofing. A tea-colored stain appears near the smokeshaft, then a bubble. People call their roofer, that changes a couple of tiles, and the leakage continues because the water access goes to the flashing, not the field.
The repair is surgical. We eliminate roof shingles and tip flashing at the chimney sides and back, examine the sheathing, and change any kind of jeopardized sections. Then we mount brand-new base blinking and a correctly sized cricket where needed by code or by common sense. The counterflashing enters into a reglet cut into the mortar joint, not the block face, with a depth and incline that hold the metal without depending on sealer. Copper is the premium selection, aging gracefully to a brownish aging and standing up to rust for generations. Stainless steel is outstanding where copper would certainly be visually disruptive or budget-prohibitive. Light weight aluminum is functional in some contexts however not ideal against stonework. The last seal at the reglet utilizes a top-quality urethane or butyl, tucked and pressed, as opposed to an exposed smear.
If your roofing is brand-new yet the blinking is old, change the blinking prior to the following winter season. Shingles will not compensate for fallen short metal, and the water that enters at that joint does far more damage due to the fact that it takes a trip hidden along mounting prior to it shows up indoors.
Problem 5: Draft and smoke concerns - when the fireplace misbehaves
A handsome wood fire ought to raise efficiently and melt intense without sending smoke right into the room. When it doesn't, the trouble generally traces back to one of a few perpetrators: wrong flue size relative to the firebox opening, a cold or uninsulated flue, adverse stress in your house from limited building or completing exhaust fans, or an obstructed or improperly developed throat and smoke chamber.
Diagnosing draft problems calls for a cautious ear and a bit of persistence. On a windy day, you might listen to the flue pulse. On a still, cool day, a room full of a light haze in spite of utilizing skilled wood. You break a home window and the smoke gets rid of, which suggests the house is reeling in air from the smokeshaft due to the fact that it can not find adequate substitute air elsewhere.
Right-sizing the flue to the firebox resolves lots of troubles. As a rule of thumb, the flue location need to be about one-tenth of the firebox opening for round flues, somewhat higher for square or rectangular flues. Stainless liners allow specific sizing in older chimneys where the initial tile is as well large. Protecting the lining keeps gases hot and relocating, specifically on startup when cool stonework otherwise cools the smoke and stalls the draft.
The smoke chamber over the firebox usually requires attention. Historically, masons parged this chamber about, leaving spaces and steps that develop turbulence. Smoothing and shaping the chamber with a refractory parge compound boosts flow markedly. A top-sealing damper additionally helps, specifically in tighter homes. Installed at the flue top, it seals out cold air when the fire place is idle and opens with a wire at the fireplace. The pile keeps warmer in between burns, and the initial fire captures even more easily.
Ventilation balance matters also. Array hoods, bath followers, and HRVs can turn around a fire place's draft in closed homes. A very discreet make-up air option, either a dedicated air vent or a home window protocol, usually cures what individuals think is a masonry problem.
The costs chimney cap - a tiny detail with outsized impact
Many smokeshafts are left with an open flue tile and nothing more. Birds enjoy it. Rain enjoys it extra. A correctly sized cap keeps weather, pets, and cinders in check while enhancing draft by breaking wind shear at the top. I recommend stainless steel or copper caps with a skirt that covers the flue floor tile and fastens mechanically without drilling right into the ceramic tile face. For multi-flue chimneys, a personalized pan cap is perfect. It spans the entire crown, consists of mesh sized to your gas kind, and leaves appropriate clearance for exhaust. Match the mesh to the regional code and your fireplace kind. Wood-burning devices require spark arrestor mesh; gas appliances often have various requirements.
A common blunder is mounting a perfectly made cap on a stopping working crown. Water then migrates beneath the pan and departures via the brick, capturing dampness. Address the crown initially, place the cap second, and you'll avoid that trap.
What you can do currently, what to schedule, and what to insist on
If you wish to maintain your smokeshaft in the silent, dependable group, produce a cadence around simple checks and specialist solution. Right here is a succinct, high-impact plan that values your time and increases bench on safety and security and aesthetics.
- Book a certified smokeshaft assessment with a cam scan prior to home heating period, also if you seldom melt. Ask for composed findings with photos. Walk the home after a hefty rainfall and once again after the very first freeze. Look for spots near the smokeshaft, hairline splits in the crown, and moss along mortar joints. Burn just skilled wood with dampness content under 20 percent. Shop it covered on a shelf, not against the house. Upgrade to a top-sealing damper and a costs cap if you have persistent draft concerns or pet intrusions. Put repointing and flashing on a 5 to twelve year review cycle. Products and environment dictate the precise interval.
A brief anecdote underscores the value of this technique. A customer with a rock smokeshaft on a seaside building called around a pale salt bloom on the living room wall near the fire place. The crown had one little split, no broader than a string. The flashing was serviceable but weary. We reconstructed the crown in a fiber-reinforced mix, replaced the galvanized flashing with copper, and used a breathable water repellent to the pile. Two storms later on, the salt bloom stopped. Two wintertimes later on, the rock still looks freshly established. Small issue, took care of with rigor, no drama.
Materials matter: what to request and what to avoid
Chimney Repair work has an online reputation for patchwork, typically due to the fact that the wrong items get utilized in the incorrect locations. If you like to set criteria for your home, you will improve outcomes with a couple of firm requests.
Ask your mason to use mortar suitable with your brick. For historical brick, that usually implies a lime-rich blend at reduced compressive stamina. For modern-day block, a basic Type N, color-matched, with joints tooled to match. Need counterflashing that is reglet-cut, not surface-sealed. If you live near salt or in a wet environment, demand copper or stainless. For crowns, select a monolithic pour or a specialized crown compound as opposed to troweled mortar. For linings, request insulated stainless sized precisely to the home appliance or firebox, with documented clearances. For water repellents, pick silane-siloxane formulations, not polymers, and use after the stonework has fully cured.
Avoid the faster ways. Skip surface area caulk where a reglet belongs, skip hard, high-Portland mortars on soft brick, and miss non-breathable sealers that catch wetness. The difference in labor is modest. The distinction in life-span is large.
Cost, timelines, and what affects both
Owners tend to value straight talk on spending plans and schedules. Costs differ by area, gain access to, and scope, yet patterns hold. A crown rebuild on a single-flue smokeshaft typically falls into a mid-four-figure array when performed with exceptional materials and proper formwork. Elastomeric crown finishes utilized as component of a wider maintenance strategy cost less, usually in the reduced four figures, yet they depend upon an audio base. Repointing can range extensively. Separated joints and a couple of bricks changed could be a weekend's work. Full-stack repointing and discerning substitute on a three-story home can encounter 5 numbers, especially if scaffolding is needed. Stainless steel liners, protected and sized, vary with size and size. Expect mid to high 4 figures for a standard fire place, much more for intricate runs or when demolition of old tile is required. Flashing in copper sits in the mid four numbers on many roofing systems, climbing with high pitches, slate or tile roof covering, or difficult access.
Season issues. Fall is peak period. The very best contractors are scheduled. Set up major Chimney Repair work in late springtime or early summertime. Materials cure Chimney Repair Contractor in Lake Oswego far better, weather condition home windows are longer, and you prevent being the 3rd emergency on a gusty Friday mid-day in November.
Edge instances worth your attention
Not every smokeshaft acts by the book. Gas inserts vented into extra-large, uninsulated masonry flues commonly run awesome and down payment moisture, which condenses into acidic runoff. That eats mortar and spots the pile. The remedy is a properly sized, protected liner indicated for gas, often with a specialized condensate monitoring plan. Timber stoves aired vent with long, outside smokeshafts tend to cool down in between burns. If smoke rollout torments you, a shielded liner plus a top-sealing damper frequently turns the experience from frustrating to effortless.
Historic chimneys with decorative corbelling call for special delivery. Those projecting block courses gather water and need sharper crown overhangs and even more attentive repointing. A frying pan cap that covers the entire crown can protect delicate details while staying visually discreet.
On the modern side, tight houses with effective exhaust systems can produce unexpected unfavorable pressure. I have seen 1,200 CFM array hoods draw smoke from a shut damper. The solution is mechanical: makeup air incorporated with the hood, not a thicker damper pad.
What a precise outcome looks like
If you desire a psychological checklist of quality, photo these details. The crown edge jobs past the brick with a crisp drip kerf that throws rain clear. The flue floor tile has a neat expansion joint filled with a flexible, high-temperature sealer, not smears. Counterflashing lies flat, the reglet is straight and uniform, the sealant is put and virtually undetectable. Mortar joints are limited, color and device profile match the original work, and changed block reviews as part of the wall, not a patch. The cap rests square, the mesh holds true, and the surface integrates with the roof covering metals. Inside, the damper runs smoothly, the smoke chamber is smooth to the hand, and the draft draws a lit suit upwards even on a cold morning.
That is the silent deluxe of a well-built chimney. It looks appropriate and, extra importantly, it behaves right.
When to do it on your own and when to contact a pro
There is space for thoughtful property owners. You can check problems, tidy the crown of organic growth, keep a photo log of seasonal modifications, and also apply a breathable water repellent after masonry has actually cured if you are comfortable on a roof and recognize the product. You can change a standard cap or upgrade to a top-sealing damper with clear directions and a risk-free ladder setup.
But the structural and safety-critical jobs belong with a professional. Anything entailing the flue liner, substantial repointing, crown rebuilding, and blinking integration at the roof covering need to be managed by a pro with recommendations, insurance policy, and certifications. Inquire about cams, ask about products, ask to see similar job. Great tradespeople take pride in showing it.
The payoff
A smokeshaft is not just an air vent. It is an architectural aspect, a safety and security system, and a guardian of interior air. Manage the five usual troubles early, define materials that respect your home, and maintain a consistent upkeep rhythm. The fires will certainly light easily, the areas will certainly remain clean, and the roofline will hold its crisp shape versus wintertime light. That is security, efficiency, and sophistication straightened, which is the point of every careful Chimney Repair in the initial place.
Business Name: Ramos Masonry Construction Company Address: 1400 E Seventh St, Newberg, Oregon Website: https://ramosmasonry.com/ Email: [email protected] Phone: +15038575988